The Secret Sauce to Unrivaled Crispness: Why the Griddle Works
Imagine this: a plate boasting perfectly cooked spring chicken, its skin a deep, burnished gold, crackling with every bite, while the meat beneath remains impossibly tender and juicy. This isn't a dream; it's the promise of mastering the griddle method. While many swear by the oven for their poultry, achieving the crispiest spring chicken truly elevates to an art form when you harness the power of direct, consistent heat and strategic pressure. This guide will walk you through unlocking that sublime texture, transforming humble spring chicken into a show-stopping dish that will have everyone asking for your secret.
So, what makes the griddle method so effective? It comes down to a few critical principles. Firstly, a hot cooking surface, ideally cast iron, provides an incredibly efficient heat transfer that encourages rapid browning and moisture evaporation from the skin. Secondly, the application of weight ensures maximum, even contact between the chicken's skin and that searing hot surface. This creates an uninterrupted pathway for heat, leading to unparalleled crispness across the entire surface. Finally, the chosen poultry – a spring chicken – is intrinsically suited for this technique. Typically weighing around one pound, these younger, smaller chickens boast delicate meat that cooks quickly and skin that crisps beautifully without drying out the interior. This combination of factors is what truly sets this approach apart, delivering not just crispy, but genuinely the crispiest spring chicken imaginable.
Preparation is Key: Spatchcocking & Seasoning for Success
Before any heat even touches your poultry, the journey to the crispiest spring chicken begins with meticulous preparation. These initial steps are non-negotiable for achieving that coveted texture and flavor.
Mastering the Spatchcock: Flattening for Uniformity
The first critical step is spatchcocking, also known as butterflying. This technique involves removing the backbone and breastbone, allowing the chicken to lie completely flat. Why is this so important?
- Even Cooking: A flattened chicken cooks much more evenly, as all parts are exposed to similar heat. No more overcooked breasts and undercooked thighs!
- Maximum Skin Contact: With the chicken flat, you can ensure nearly 100% of the skin surface is pressed against the griddle, which is paramount for overall crispness.
To spatchcock your chicken:
- Using sturdy poultry shears, cut along both sides of the backbone from tail to neck to remove it. You can save the backbone for stock.
- Lay the chicken out flat, skin side down.
- With a small, sharp knife, make an incision along both sides of the breastbone.
- Use your fingers to pry the keel-shaped breastbone out.
- Finally, carefully cut away any small rib bones and the wishbone, which typically runs along the front, thicker part of the breast. This further flattens the bird and makes it easier to carve later.
The Dry-Patting & Seasoning Ritual
Moisture is the enemy of crispy skin. Any lingering water on the surface of the chicken will turn into steam when it hits the hot griddle, effectively steaming the skin instead of crisping it. This is why thorough drying is absolutely crucial. As seasoned chefs know, it’s one of the two golden rules for exceptional roast chicken (the other being letting it come to room temperature). Pat the chickens vigorously with paper towels until they are bone-dry. Don't rush this step!
Once dry, season your chicken generously with coarse salt and freshly cracked black pepper. Coarse salt provides a more even seasoning and draws out moisture effectively, aiding in the crisping process. Remember, a well-seasoned skin is a flavorful skin.
The Flavor Infusion: Aromatic Marinade
While the griddle provides the crispness, the marinade infuses the chicken with depth and tenderness. In a large bowl, combine quality olive oil, several crushed garlic cloves, and fresh rosemary sprigs. Gently turn the prepared chickens in this aromatic blend until they are thoroughly coated. Cover the bowl with plastic wrap and refrigerate for a minimum of 8 hours, or ideally, overnight. Make sure to turn the chickens once or twice during this time to ensure even flavor distribution. The long marination period allows the flavors to penetrate the meat, and the olive oil contributes to a beautiful golden-brown crust. For further insights into the magic of this marinade and the importance of weighting, you might find valuable information in Lidia's Griddle Crisp Spring Chicken: Weight & Marinade Secrets.
One last critical step before cooking: let your marinated chicken stand at room temperature, uncovered, for about one hour prior to hitting the griddle. This brings the chicken to a more even temperature, promoting uniform cooking and preventing the initial chill from dropping the griddle's heat too drastically.
The Griddle Method: Achieving The Crispiest Spring Chicken
With your chicken prepped and marinated, it's time for the main event: the griddle. This is where the magic truly happens, transforming your efforts into a culinary masterpiece.
Setting Up Your Crisping Station
- The Griddle: A heavy stovetop griddle is ideal for this method. Inexpensive cast iron griddles that fit over two burners are excellent, providing a large, even heating surface. If you don't have a dedicated griddle, two wide cast-iron skillets will work just as well. The key is heavy, heat-retaining material.
- The Weights: To press the chicken down, another heavy skillet (preferably cast iron) placed on top of the chicken does the job perfectly. Alternatively, bricks or half-bricks wrapped tightly in aluminum foil make excellent, even weights. The goal is to apply consistent, heavy pressure across the entire chicken.
- Heat Management: Place your griddle or skillets over medium-high heat. Allow them to heat thoroughly until a drop of water flicked onto the surface evaporates almost immediately. This ensures your griddle is hot enough to create that initial sear for crisping.
The Weight-Pressing Technique
This is the heart of the griddle method:
- Carefully place the marinated, room-temperature chickens onto the hot griddle, skin side down.
- Immediately place your chosen weights (skillet or foil-wrapped bricks) on top of the chicken. The weights should be positioned to press the greatest amount of skin down, ensuring maximum contact with the cooking surface.
- Now, resist the urge to peek! Cook the chicken undisturbed for 7 to 10 minutes. This initial period is crucial for developing a deep golden-brown crust and preventing sticking. Peeking too early or trying to move the chicken will likely cause the skin to tear or stick. The longer it cooks undisturbed, the less likely it will be to stick.
- After 7-10 minutes, the skin should be deeply golden and wonderfully crispy. Gently turn the chickens over. If any spots stick, use a thin metal spatula to carefully release the skin.
- Weight the chickens down again and continue cooking until the other side is deep golden brown and crispy, and the chicken is cooked through with no trace of pink, approximately 7 more minutes. For food safety, the internal temperature should reach 165°F (74°C) in the thickest part of the thigh.
The result should be chicken that is undeniably crispy on the outside, yet incredibly juicy and tender on the inside.
Troubleshooting & Expert Tips
- Uneven Crisping: If you notice some areas crisping more than others, try to adjust the placement of your weights to distribute pressure more evenly. You can also slightly rotate the chicken during the second cook cycle.
- Sticking: This is often a sign the griddle wasn't hot enough, or you tried to move the chicken too soon. Ensure proper preheating and let the chicken develop a crust before attempting to flip.
- Scaling for Size: Most spring chickens are around one pound. Estimate how many deboned, flattened chickens will comfortably fit on your griddle without overcrowding. If you're cooking for a crowd, you might need to work in batches to maintain griddle temperature and ensure proper browning.
- Alternative Cooking Surfaces: While the griddle excels, this method can also yield fantastic results on a clean charcoal grill. The direct heat and smoky flavor add another dimension. For a comprehensive look at how this method compares to oven roasting, check out Griddle vs. Oven: Best Practices for Crispy Spring Chicken.
Beyond the Griddle: Serving & Variations
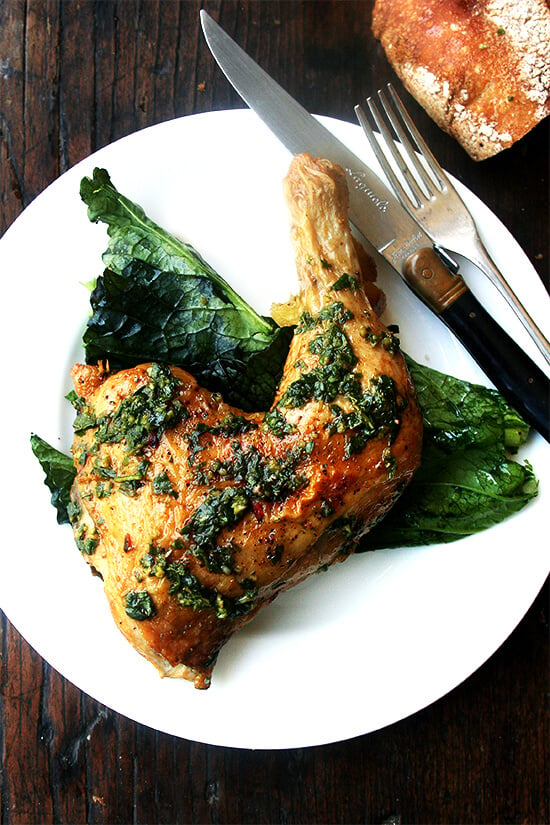
Once your crispiest spring chicken is perfectly cooked, resist the urge to carve it immediately. Allow the chicken to rest for about 10 minutes off the heat. This crucial step allows the juices to redistribute throughout the meat, ensuring every bite is moist and flavorful. After resting, carve and serve immediately to enjoy the skin at its peak crispness.
This exquisite chicken pairs beautifully with simple sides that let its flavor shine. Think a fresh green salad with a light vinaigrette, roasted asparagus, lemon wedges for a zesty squeeze, or even a simple herb sauce made from pan drippings for an extra layer of flavor. Don't be afraid to experiment! This technique also works wonderfully with other small poultry like quails, which will cook in about half the time, offering another delicious option for a quick, impressive meal.
Mastering the crispiest spring chicken method is a rewarding culinary achievement that promises deeply flavorful, incredibly juicy meat enveloped in a crackling, golden skin. By following these detailed steps – from precise spatchcocking and thorough drying to the crucial griddle technique with applied weight and proper timing – you'll consistently achieve restaurant-quality results in your own kitchen. So, fire up your griddle, embrace the process, and prepare to enjoy chicken unlike any you've had before.
